
Xtranscoder Advanced Settings Guide
FFmpeg Defaults, Presets & Pro Tweaks
Learn how to get the best results from your self-hosted live streaming transcoder:
RTSP/RTMP/HTTP → HLS, with the right x264 presets, bitrate control, keyframes, audio settings,
and when to use Static vs On-Demand mode.
Important: The defaults are the sweet spot for most channels —
only change advanced settings when you have a specific goal.
Quick Start Workflow (Daily Use)
One-Line Install (Ubuntu 22.04 / 24.04)
Install the demo with one command. During install you can enable HTTPS by providing a domain — the installer will automatically set up SSL on the panel and streaming endpoints. This is especially useful when you need to play HTTP sources on an HTTPS website.
bash <(curl -fsSL http://www.install.xtranscoder.com/xtranscoder.sh)
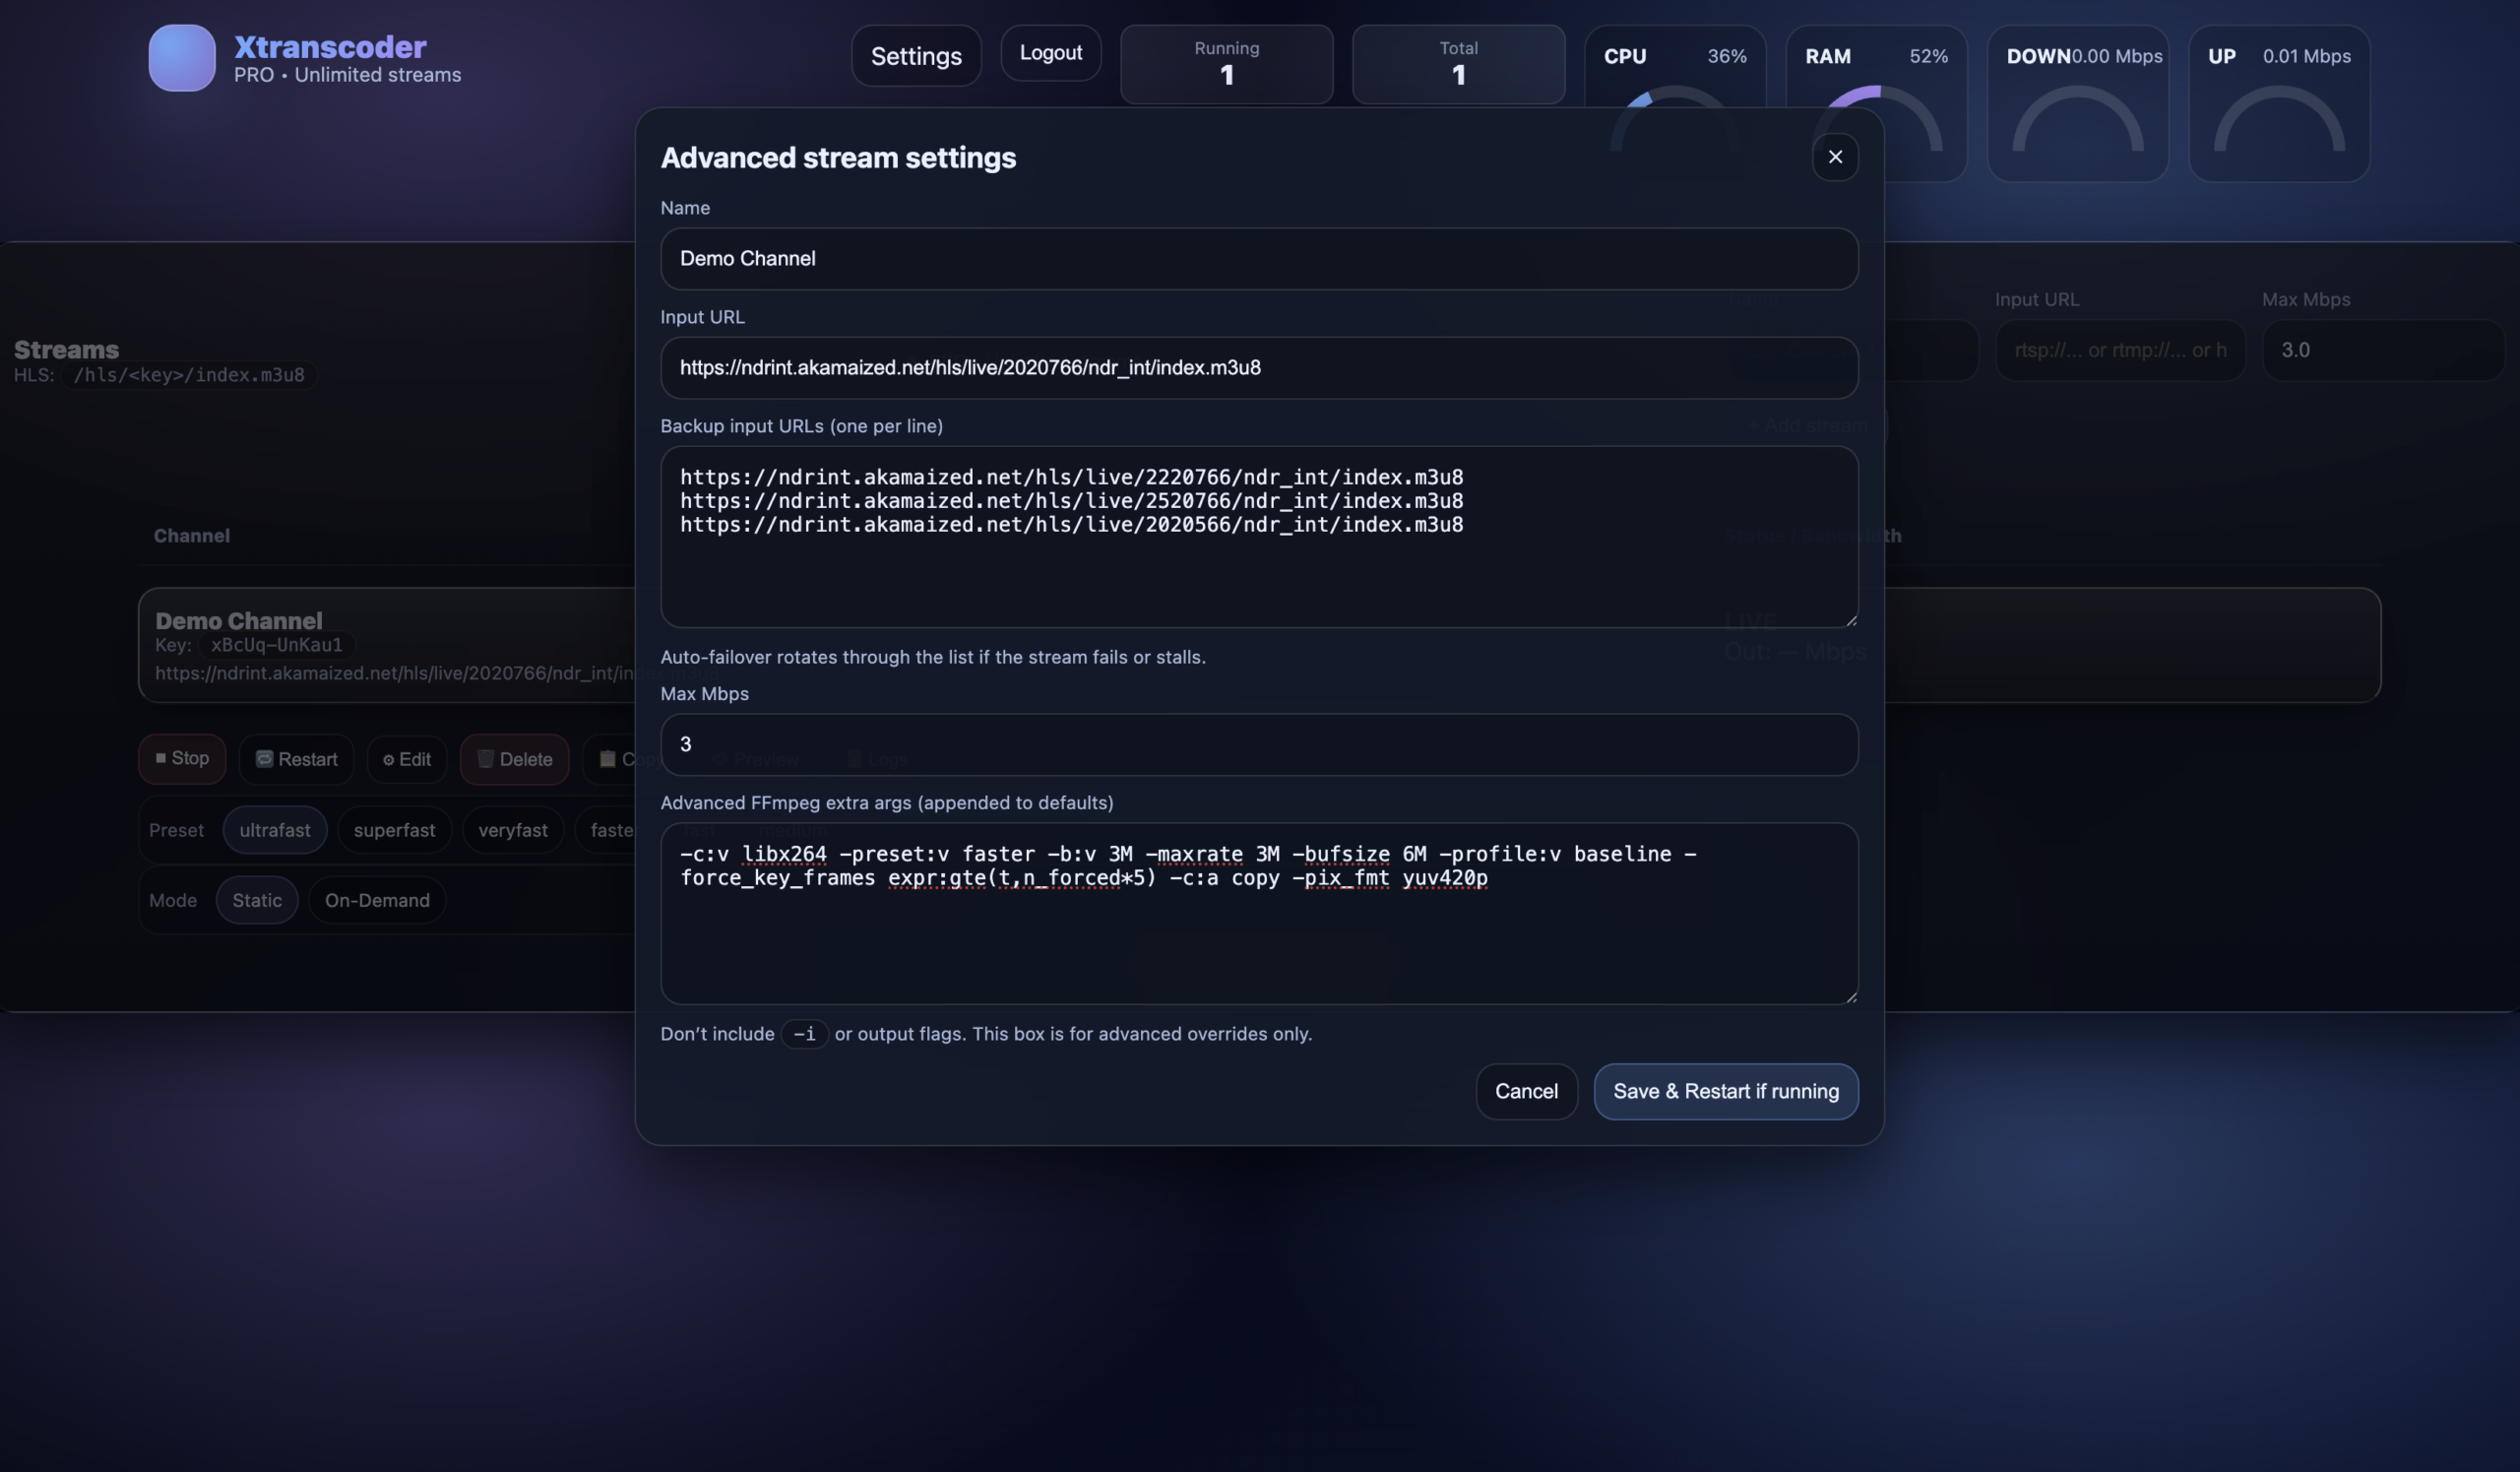
Default Transcoding Settings (The Sweet Spot)
By default, Xtranscoder uses an H.264 (x264) setup designed for reliability, compatibility (including older devices), and stable streaming bitrates. These defaults are an excellent balance of quality, CPU cost, and player compatibility.
-c:v libx264 -preset:v faster -b:v 3M -maxrate 3M -bufsize 6M -profile:v baseline -force_key_frames expr:gte(t,n_forced*5) -c:a copy -pix_fmt yuv420p
Preset Options (ultrafast → medium)
Presets control how hard x264 works to compress video. Slower presets can improve quality at the same bitrate, but they use more CPU.
- ultrafast: lowest CPU, worst compression efficiency (quality drop at low bitrates).
- superfast / veryfast: great for many live feeds; common “workhorse” presets.
- faster (default in your guide): strong balance for CPU streaming servers.
- fast / medium: better compression/quality at same bitrate, but higher CPU.
Mode: Static vs On-Demand
Xtranscoder supports two operating modes per channel:
6 Advanced “FFmpeg Extra Args” Examples (Copy/Paste)
Paste these into Advanced FFmpeg extra args for a channel. These are appended to the safe defaults.
Do not include -i or HLS output flags.
1) Incoming ~10 Mbps → Target ~2 Mbps (minimal quality loss)
Use a tighter bitrate cap while keeping compatibility. Great for bandwidth reduction.
-b:v 2M -maxrate 2M -bufsize 4M -preset:v faster
2) Better quality at the same bitrate (more CPU)
If your CPU has headroom, slower presets squeeze more quality out of the same Mbps.
-preset:v medium
3) Reduce CPU usage (accept slightly lower efficiency)
When running many channels on a budget CPU server.
-preset:v veryfast
4) Force AAC audio (when “copy” causes playback issues)
Useful if the source audio codec isn’t ideal for your target players.
-c:a aac -b:a 128k -ac 2 -ar 44100
5) More frequent keyframes (snappier seeking / segment alignment)
Drops keyframe interval to 2 seconds (can slightly increase bitrate spikes).
-force_key_frames expr:gte(t,n_forced*2)
6) Stronger compression for low bitrates (recommended for 1 Mbps–1.5 Mbps)
When you must push bitrate down, a slower preset can help preserve detail.
-b:v 1200k -maxrate 1200k -bufsize 2400k -preset:v fast
Best Practices for RTSP/RTMP/HTTP → HLS
- Use On-Demand mode to reduce CPU costs when streams are viewed intermittently.
- Keep baseline + yuv420p for maximum player compatibility (web + mobile).
- Lower -b:v and -maxrate to control bandwidth and CDN spend.
- Change presets only when you need more compression (slower) or lower CPU (faster).
- Use logs to quickly identify unstable sources and confirm failover behavior.